First Steps into OpenDaylight with Brocade
It’s not often that catch-up meetings with vendors lead to anything particularly exciting but a recent one I attended with Brocade was a little different. While Brocade have had Openflow support for a very long time, it was pointed out that teamed with OpenDaylight it might solve a few problems we’re looking to tackle.
While they do have their own packaged offering, I took the opportunity recently to start experimenting with what we can do in the open source version of OpenDaylight. After all, it’s free and the switches we operate already have support for it.
So… off to the lab and get plumbed in.
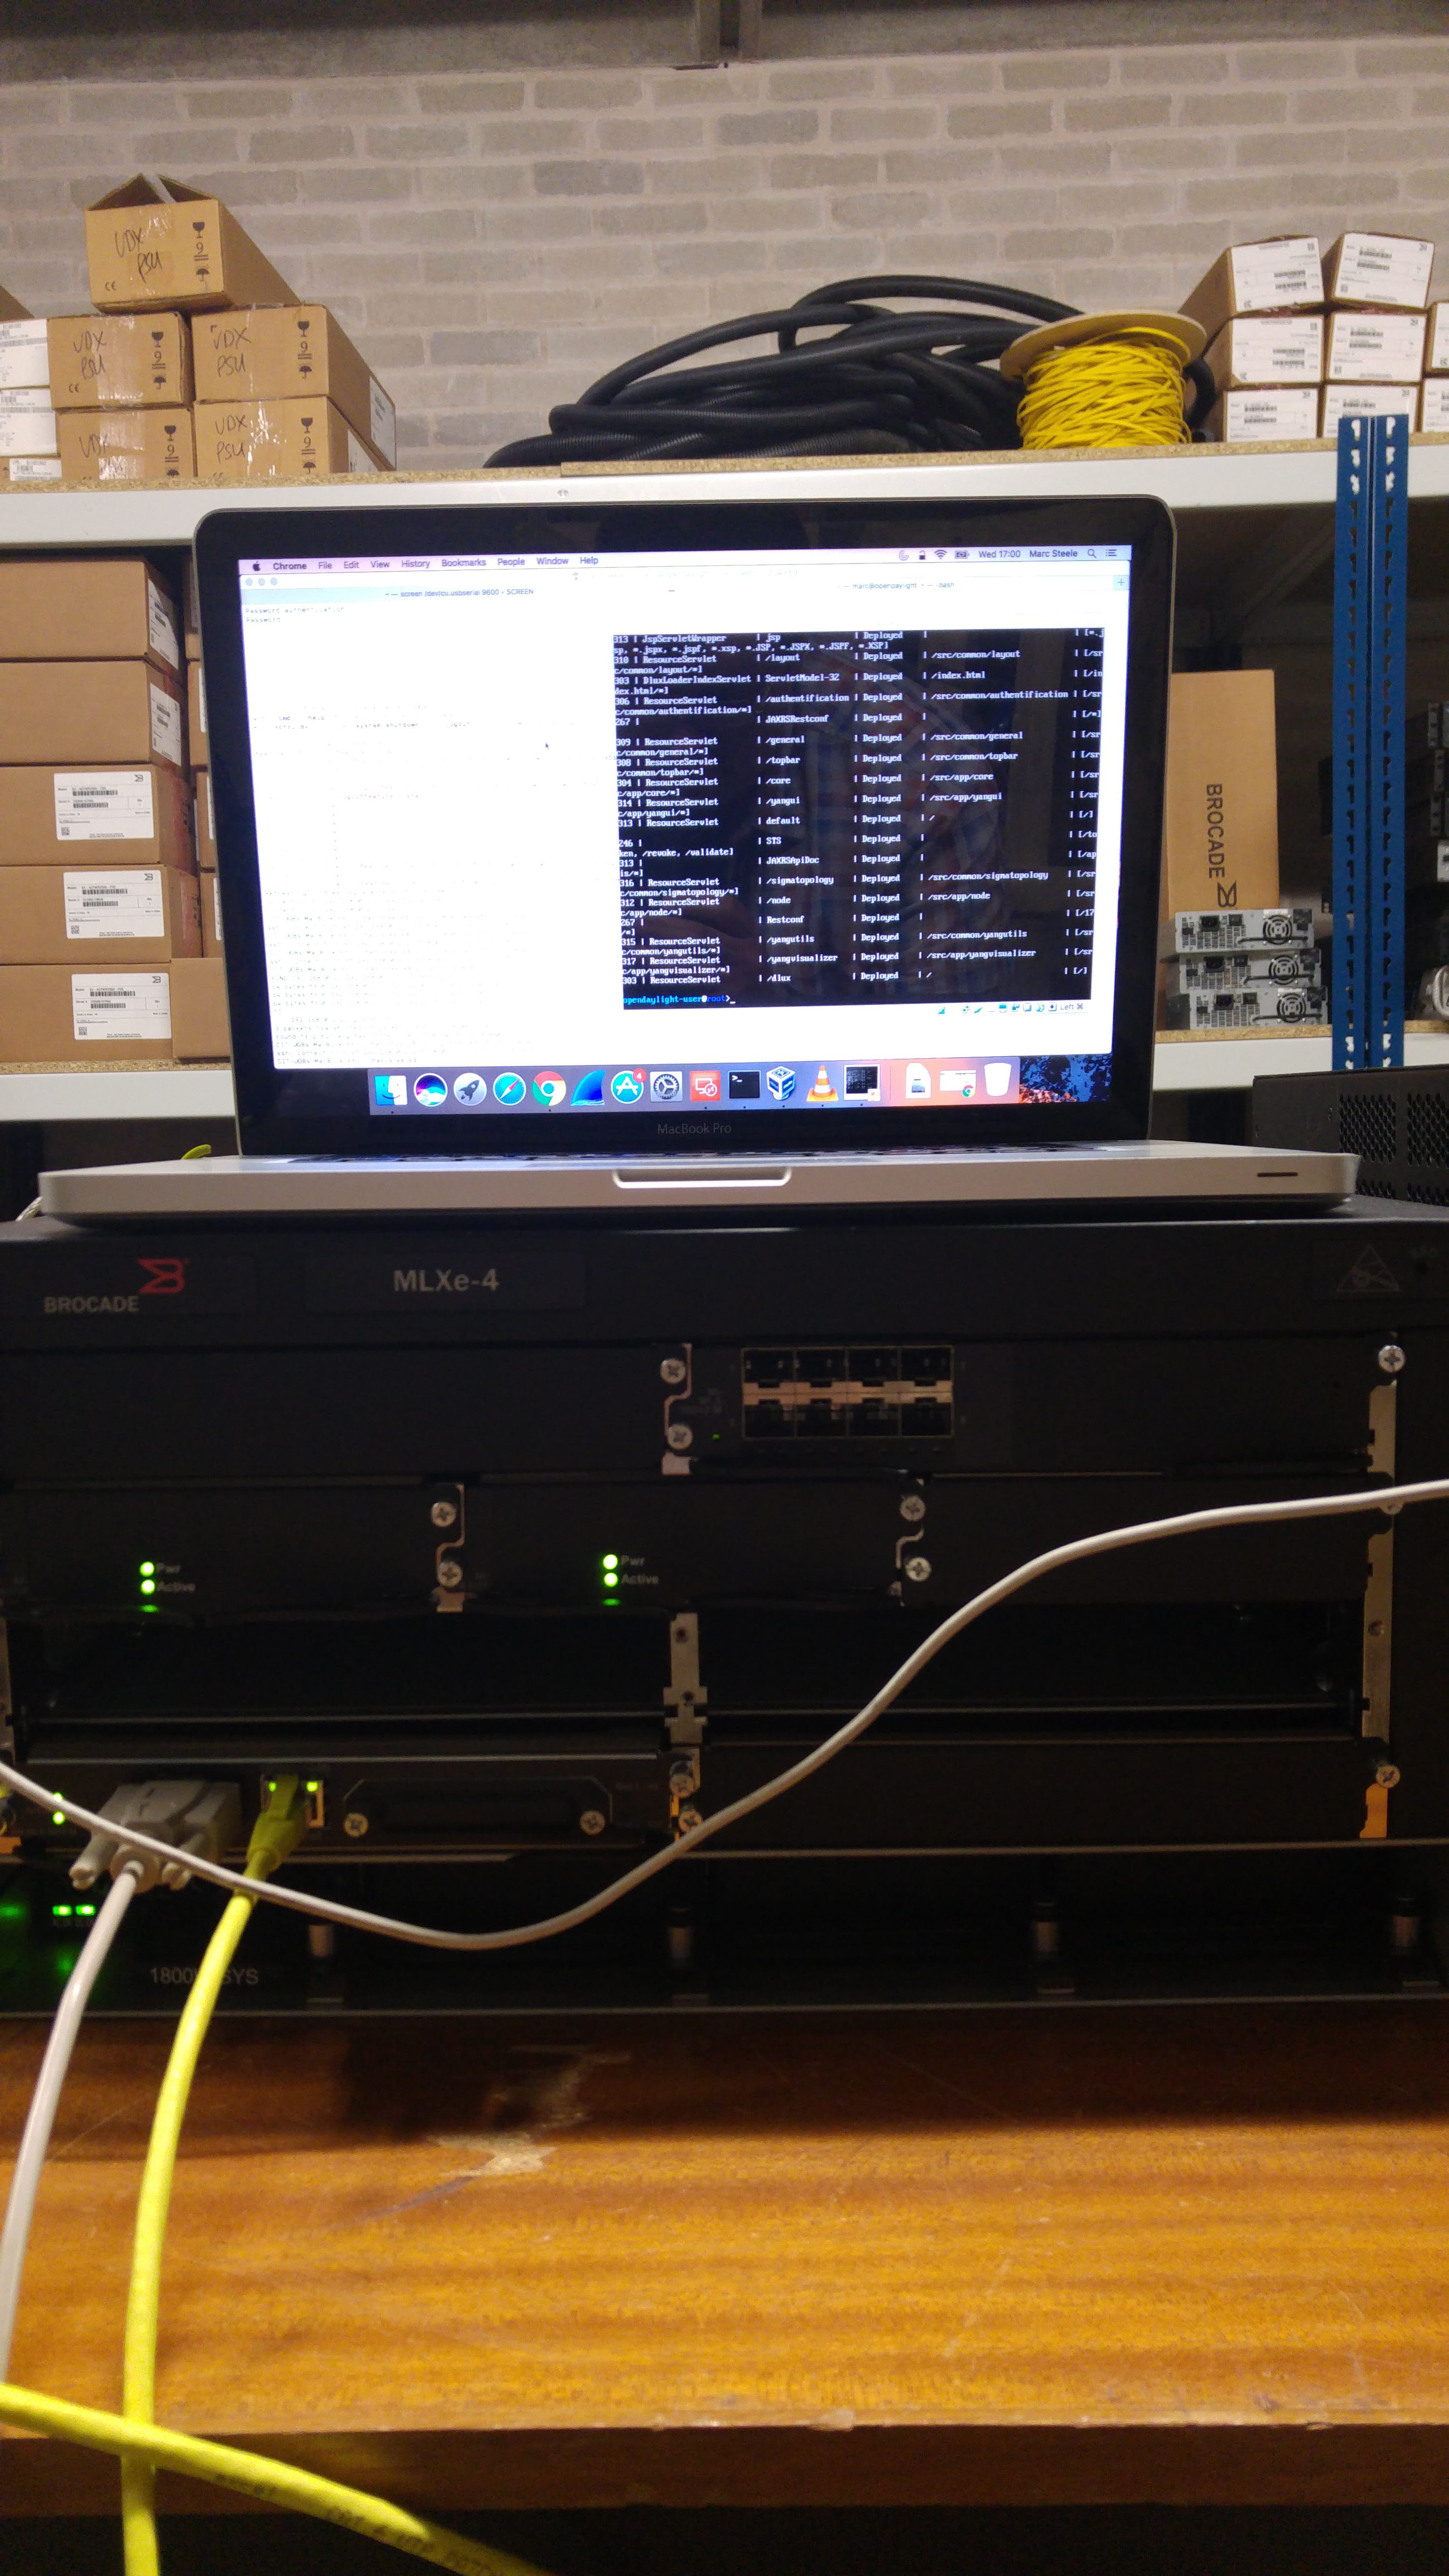
A laptop and MLXe plumbed in.
Ok, that rig might be a little overkill and a setup for the photo. 😉 Either way, I’m now working with the much smaller ICX 7450 units.
Before we get really into it, we ought to cover the components needed to make the whole thing work. We’ll need OpenFlow compatible switches to work with. That’s where the Brocade kit comes in. From memory, Comware 7 devices in the HPE world can also do the job but we’ll be concentrating on Brocade as that’s what my current employer runs.
We also need a controller of some form. That’s where OpenDaylight comes in. For my experiments, I’ve been running it on a laptop VM but any Ubuntu box 16.04 server should make a good starting point.
With a rough idea of what we’ll be setting up, we can now get into it. Let’s start with getting a controller running.
Grab yourself a copy of Ubuntu Server 16.04 (LTS). Configure it with a static IP address and ensure it has full access to your physical network. That means if you’re running the VM in VirtualBox, you’ll need to change the network interface mode from NAT to bridged.
With the server up and running, we can now look at installing the OpenDaylight controller. The basic installation is detailed on their website (here). You want to follow the steps for a DEB based installation.
Once you’re into the karaf console (the console used to manage the OpenDaylight controller), there’s a number of modules you’ll need to install. To get you going quickly, run the following command:
feature:install odl-dlux-all odl-openflowplugin-southbound odl-netconf-connector-all odl-l2switch-switch-ui emo-openflow-renderer odl-openflowplugin-flow-services-ui odl-restconf odl-l2switch-all odl-centinel-all odl-openflowplugin-flow-servicesWith the controller up and running, we can now look at getting the switches talking to it. Setting them up to run OpenFlow is really simple:
openflow enable ofv130

openflow controller ip-address 192.168.0.2 no-ssl
Some switches will need limits configuring but out of the box but you will be warned in those cases. Either way, all we’ve done so far is enable OpenFlow globally and set the IP address of the controller. We’ve also set the switch not to use SSL in the connection. This is fine in the lab, not so great in the real world.
The connection to the controller can be checked with the show openflow command.
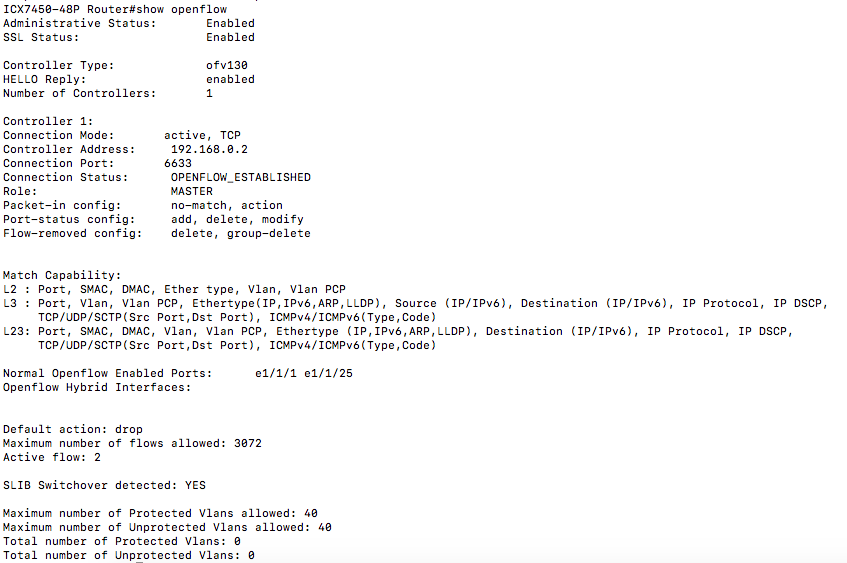
Checking the status of OpenFlow on a switch.
The observant of you will see that I’ve already enabled OpenFlow on a couple of ports on this switch. To do this, run the following commands:
interface ethernet 1/1/1

openflow enable layer23 hybrid
You will likely get a scary warning when you do this. Heed the warning about FDP and more worryingly STP being disabled as part of this.
The switch warns us about OpenFlow vs FDP and STP.
This doesn’t happen on every switch but is worth noting. Another point to bear in mind is that on certain switches (e.g. MLXe), ports cannot be added to OpenFlow if they’re not on VLAN 1. The port(s) can however be added to the VLAN again after enabling OpenFlow.
Either way, we can now confirm that we’re getting data by looking in the OpenDaylight web console (http://[ipaddress]:8181/index.html) and selecting the Nodes option in the menu. If we’re successful, you’ll see something like this:

OpenFlow shows a live node.
Clicking on the “Node Connectors” link will show you the interfaces OpenFlow is enabled and reporting from. The flows link won’t show you any information. If you’re anything like me, that should strike you as a bit odd. Especially if you’ve got traffic flowing over the link.
Turns out you need to install flows in the switches to act on them. Otherwise, the traffic will be forwarded as per normal with little to no information coming back to the controller.
The simplest way to install a flow is through the Yang GUI. Before we go into it, you’ll need to make a note of the OpenFlow ID for the switch you’re interested in applying this to.
Armed with this information and now in the Yang UI, select opendaylight-inventory -> nodes -> node -> table -> flow from the API tree at the top of the screen. Now change the HTTP action from GET to PUT and enter the following information:
http://192.168.0.2:8181/restconf/config/opendaylight-inventory:nodes/node/openflow:106225802122400/flow-node-inventory:table/0/flow/0

{

    "flow": [

        {

            "id": "0",

            "match": {

                "ethernet-match": {

                    "ethernet-type": {

                        "type": "2048"

                    }

                },

                "ipv4-destination": "192.168.0.0/16"

            },

            "flow-name": "matchTest",

            "installHw": "true",

            "priority": "2",

            "idle-timeout": "0",

            "hard-timeout": "0",

            "table_id": "0"

        }

    ]

}
Here we’re creating the flow on node openflow:106225802122400. We’re specifically matching IPv4 traffic (ethernet type 2048) with a destination of 192.168.0.0/16. You’ll need to adjust the address space to match.
You need to be careful that the table ID and flow ID values match in both the JSON (or XML) and the URL.
A couple of other points worth noting at the flow ID and the flow table. The former is simply a unique ID for each flow in a table on the switch. The latter is a series of flow tables that a packet can be processed through as part of the complex chains you can build up in OpenFlow.
As you can see in the screenshot below, it’s possible to add a lot more options for selecting what matches a flow you want to take action on. This means that you could be incredibly specific about what you want to forward, drop or even redirect.
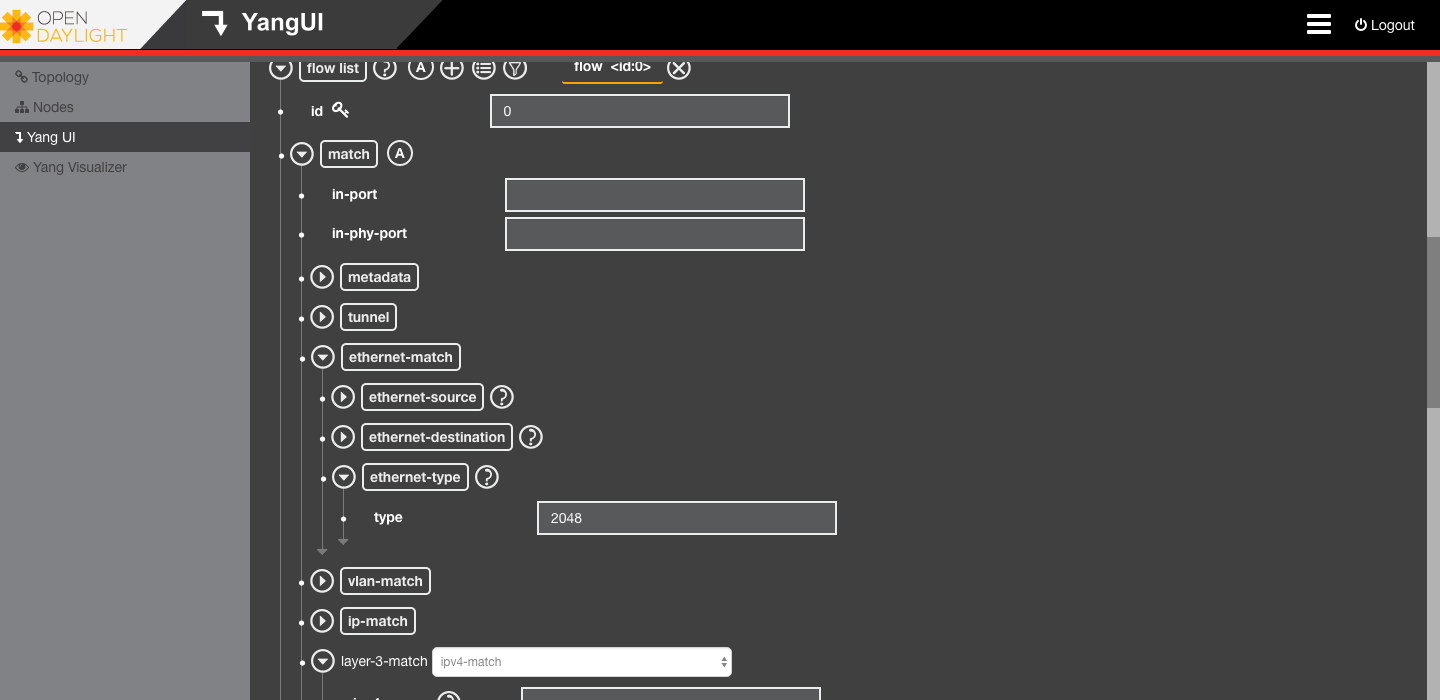
Some of the flow match options in OpenDaylight/OpenFlow.
The way I had it sold to me was you could selectively bypass a firewall under controlled circumstances. A bit of a brave option but could get you out of a sticky spot.
Assuming you hit post and everything is a-OK, you should now have a flow programmed in the OpenFlow database. Ideally, this flow should now be programmed in the switch as well. Except it isn’t.
A quick check with a packet sniffer shows the switches and controller are talking. So why isn’t the flow being installed?
Unfortunately, this is where I ran out of time to look at this issue but I will update if I get time to experiment. That said, my speculation would involve the hybrid port feature on the Brocade switches. It’s an option I had to enable to allow basic routing between the two switches to work once OpenFlow was enabled.
Either way, the technology looks interesting. I guess I’ll just need to spend a bit more time with it and hopefully be able to build the slightly clever mirror port feature I need for an upcoming project.

hi, I am using icx 7250-24 series , when I type the command “show openflow ” the output is that “invalid input -> openflow”, how to enable it?